Monday, January 31, 2011

Banana Cupcakes with Orange Cardamom Butter Cream

final

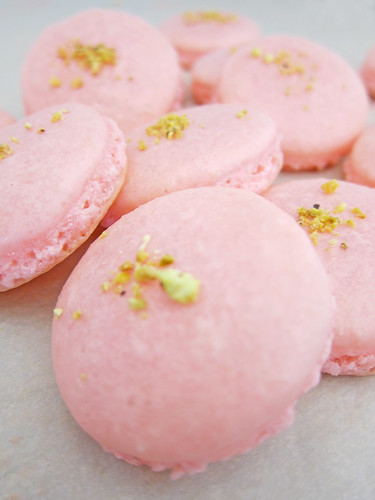
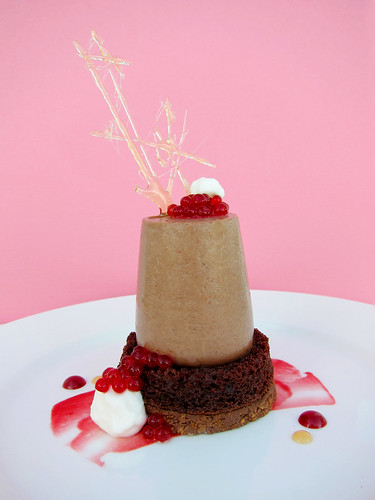
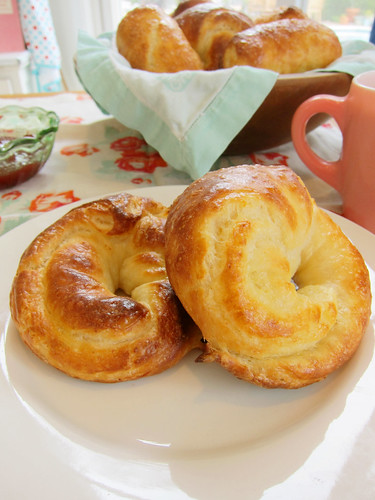
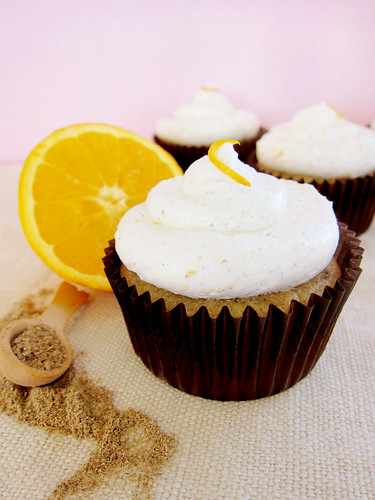
These were great! The banana cupcake was a bit like soft banana bread and the orange and cardamom butter cream paired nicely.

______________________________________________________________

Banana Cupcakes with Orange Cardamom Butter Cream
Makes 12


For the batter:

1 cup all-purpose flour
1/2 teaspoon baking powder
1/2 teaspoon baking soda
1/4 teaspoon salt
1 stick unsalted butter, softened
1/2 cup sugar
1/4 cup sour cream
1 1/2 teaspoons vanilla extract
2 large eggs
2 large ripe bananas
1/2 cup chopped walnuts, optional

Preheat oven to 350 degrees. Line cupcake tin with liners.

In medium bowl, combine flour, baking soda, baking powder and salt.

In a food processor, blend sour cream, vanilla and bananas till smooth.

In the bowl of a stand mixer, cream butter and sugar till light, 3 to 5 minutes. Add eggs, one at a time, combining well after each addition. Add banana mixture alternately with the flour mixture till combined. Careful not to over mix. Bake 20 minutes. Cool completely before frosting.

For the butter cream:

1 cup granulated sugar
4 large egg whites
3 sticks of butter, room temperature
1 tablespoons pure vanilla extract
2 tablespoons orange zest
1/2 teaspoon orange extract
2 tablespoons ground cardamom

Put sugar and egg whites in a double boiler over simmering water. Whisk constantly until the mixture is hot to the touch and looks white, creamy, opaque and slightly thickened, about 5 to 7 minutes. Place into the bowl of a stand mixer fitted with the whisk attachment and whisk for 5 minutes. You will get a thick shiny meringue. After 5 minutes, switch over to the paddle attachment. Set speed to medium high and add soft butter, one tablespoon at a time, incorporating fully before adding more. Once all the butter is incorporated add the vanilla extract, orange extract, zest, and cardamom. Let the mixer run for another 3 to 5 minutes.

Wednesday, January 26, 2011

Rose and Pistachio Macarons

021


A while back, while in a cute little gift shop, I bought some rose sugar. I always looked at it sitting there in the pantry knowing one day I would find a use for it. Finally the sugar has found its place! I used this Violet Macaron recipe from Tartlett. I just replaced everything violet with everything rose. I also added finely chopped pistachios to the butter cream.


Macarons are tricky little things. Once you understand how they work, they start to come naturally. But you just have to mess up a few times to learn what NOT to do before you can become a master at what you ARE supposed to do.


It is a fairly simple process. You start by whisking the egg whites till they are just frothy.

001


Slowly add sugar till you reach stiff peaks. Careful not to over mix or the egg whites will be too dry! You can also add food coloring at this point.

002


Fold the beaten egg whites into powdered sugar and almond meal. This is the part that determines how nicely shaped your macarons will be. If you don't mix enough, the macarons will be too fat. If you over mix, the batter becomes too unmanageably runny that you can't even pipe the circles. Finding the perfect balance is the key. Tartlett says it should not take more than 50 strokes. As soon as the batter falls back into itself, it should be good.

004


Pipe 1-1/2 inch circles onto parchment lined baking sheets. Top with a little garnish. Let sit on counter for 45 minutes. This dries out the surface of the macaron and creates the macaron's signature "foot" when it is baked. The shell stays in tact and the soft batter underneath puffs up.

007

Bake at 280 degrees for about 15 minutes. Let cool slightly before trying to remove from the parchment. If you have trouble removing them, a little water underneath the parchment helps to loosen them. Finish them off with a tablespoon of the pistachio butter cream.

009


The rose in this was so nice! Not too overpowering. And the pistachio added a nice crunch. I am happy to have finally used the wonderful rose sugar!


Ooh and I just signed up for Blog Lovin!!

Follow my blog with bloglovin


Thursday, January 20, 2011

Gnome Card

009

My good friend Nicole turned 21 on the 18th. She loves gnomes and woodland themes so I made her this little gnome card. I kind of envisioned that Nicole was having this awesome forest birthday party and a little gnome came along and started eying the cake!

I just printed a couple of key elements from the computer, like the frame and the gnome. Then I sat down with a big pile of colored paper, scissors, and glue. I didn't know exactly how I was going to set it up. It just sort of evolved, but there was definitely some unnecessary over construction due to the fact that I had no plan. Lots and lots of layers and gluing!

002


These flames were little nightmares!! Tiny tiny tiny. I used a toothpick to glue them.

004


Sneaky little gnome!

013

012

Little mushrooms!

006

Gnome Birthday Card

I really liked how this turned out and it was such a fun project for a very amazing person!! Happy Birthday Nicole!!!


Tuesday, January 18, 2011

Chocolate Panna Cotta

Chocolate Panna Cotta

So here comes another multi-component Cooking Channel inspired dessert. I think I was watching Unique Eats or something and the episode was all about candy. This one pastry chef (I really need to write down their names!) makes a fancy shmancy dessert called The Candy Bar. Each layer is a unique representation of elements from classic candy bars. There was a caramel peanut layer, a crunchy chocolatey kit kat type layer, etc. It looked really whimsical and delicious and I couldn't wait to come up with my own version. So I decided on 3 main components; chocolate panna cotta, chocolate cake, and my version of the crunchy kit kat layer I saw on the show. For the panna cotta, I used this recipe I found on Sugar Rush. The chocolate cake is just a standard recipe, you can use any cake you'd like.

The kit kat layer took some experimenting. The chef mentioned it was crepes, baked in the oven, crumbled and mixed with chocolate. So here is my recipe for the kit kat layer.

___________________________________________________________________
Chocolate Hazelnut Crunch

2 large eggs
3/4 cup milk
1/2 cup cold water
1 cup flour
3 tablespoons melted butter
1/2 cup Nutella
3/4 cup semisweet chocolate, melted

Preheat oven to 350 degrees.

In a medium bowl combine eggs, milk, water, flour and melted butter. Heat a sauce pan over medium low heat. Coat with cooking spray. Because these crepes are going to be baked and broken up, it really doesn't matter how they look. They can rip and tear, they can be underdone or over done. This is the most relaxing crepe experience you will ever have!!

Once you have cooked all your crepes, lay them on sheet pans, careful not to overlap. You will need about 4 separate sheets or you may need to work in batches. Bake at 350 for about 20 to 30 minutes. This can turn on you quick so keep an eye on them. If you notice the edges start to brown, carefully break them off with tongs.

Once all the crepes are a nice golden color, place in a food processor and pulse till ground. Add Nutella and melted chocolate. Spread in a parchment lined 13x9 inch pan and cool in refrigerator. When ready to use, cut into whatever shape you would like, I used a 3 inch round biscuit cutter.

Once crumbled, the crepes should look like this.
blog 4

And this is the finished product

Blog 1
_____________________________________________________________


Some of the most interesting elements on the entire dessert were the garnishes. The chef topped it all off with a cherry "caviar" garnish. I have seen this plenty of times on T.V. but for some reason, this time, I decided to try it myself. I didn't even know if it was possible. Chefs these days have such a large arsenal of interesting tools and chemicals to create absolutely mind blowing desserts. And I don't know about you, but I don't have liquid nitrogen laying around in my pantry. So I sat at my computer, went to Google, and found this video.

I was still a bit apprehensive, but I can honestly say it was super easy and they turned out great! You basically drop little balls of slightly solidified jello into cold oil. The viscosity of the oil is what creates the sphere and the temperature is what sets the jello. So here is my modified recipe.

______________________________________________________
Black Cherry "Caviar"
Makes: About a cup

Special Equipment:

An 8 to 10 inch tall container, like a glass
A squeeze bottle or a dropper


Ingredients:

2 to 4 cups canola oil, depending on size of container
10 ounces water
15 pitted black cherries
2 teaspoons sugar
3 tablespoons cherry brandy
2 envelopes unflavored gelatin

Fill container with canola oil and place in freezer for about an hour. The goal is to get the oil really really cold, but just enough so that the oil is still liquidy. You know you've gone too far when the oil is the texture of loose Vaseline. But no fear, about 3 minutes on the counter and some stirring loosens it up again.

Meanwhile, place water, cherries, sugar, and brandy in a small saucepan. Bring to a boil and simmer for 10 minutes. Cool and puree in a blender. Strain through a fine mesh strainer. The idea here is to get 8 ounces of liquid from this. If you end up with less, just top it off with more water and cherry brandy. Once cool, sprinkle gelatin over the top and let bloom for about 10 minutes. Place back in saucepan over low heat just till the gelatin dissolves. If using a squeeze bottle, pour mixture into it now. Place in fridge until the mixture thickens slightly. You don't want any chunks or lumps. It should still be a fairly smooth liquidy mixture.

When oil is at the right temperature, you are ready to form the caviar. Using a dropper or squeeze bottle, gently drop small spheres into the oil. They will float right at the surface for a few seconds, then slowly fall to the bottom.

After you have done a few, get some out with a spoon and check the texture. If you are worried they aren't sturdy enough, feel free to add more powdered gelatin. Repeat the blooming, heating and cooling process and then keep making spheres till you have as many as you need. They can be kept in the oil overnight. When ready to use, carefully rinse them off with cold water.

I used a dropper that I just happened to find in my kitchen. It worked really well!

good one

Here they are!! The Black Cherry Caviar. I am quite pleased with them.

Black Cherry "Caviar"
________________________________________________________________


For assembly, brush some cherry preserves on the plate. Lay down the chocolate cake and crunchy hazelnut layer. Place panna cotta on top and garnish with caviar. I used this Alton Brown recipe to make some fun sugar decorations and with the remaining caramel, I made a quick caramel mousse to finish the whole thing off.

Although there are many components, each one is quite simple on its own. When they come together at the end it creates a really beautiful dessert! Perfect for dinner parties, Valentine's Day, or any occasion where chocolate is needed!

Monday, January 17, 2011

French Bread with Sea Salt and Rosemary Butter

French Bread

I love bread. I have always loved bread. I often decide where I want to eat out solely based upon what kind of bread they serve. I love french bread, sour dough bread, bread pudding. You name it, I love it. And I also love to make it. For a while now, this recipe from Steamy Kitchen has been my go-to for french bread. It comes out perfect every time and it is quite simple and quick, considering it is a yeast dough. It makes 2 loaves.

014 (2)

I also made home made butter. Easiest thing ever! You basically just put whatever amount of heavy whipping cream you want into a stand mixer fitted with the whisk attachment. Beat it until the cream separates. It will look something like this.

001

At this point, strain the mixture by squeezing the liquid through some cheesecloth or even a kitchen towel. Return the solid butter to the mixing bowl and add sea salt and rosemary, or any other combination of seasonings you would like.

I love every single part of baking bread; kneading the dough, seeing it rise, the smell that fills the whole house. For me, it is one of life's best simple pleasures.

011


Saturday, January 15, 2011

Strawberry Phyllo Napoleons


Strawberry Phyllo Napoleons


Sometime last week, I was watching Foodography on the Cooking Channel. The episode was focusing on pastry. I love baking cakes and cookies, but this episode inspired me to try something a little more fancy. One chef featured on the episode made her version of the classic napoleon using thin layers of almond cake and phyllo rounds, topped with fresh strawberries and pastry cream. Although it looked beautiful and sounded delicious, it really did seem quite simple. The weather here in Southern California has really warmed up the last couple of days, and the winds are picking up as well. It almost felt like summer instead of winter! This would be the perfect dessert for a nice summer dinner party. So here is my take on the classic napoleon. There are 5 different components to this dessert and they all come together in the end.

Almond Cake

035


Vanilla Bean Pastry Cream

073


Phyllo Rounds

Blog 4


Strawberries

Blog 3


Orange Lace Garnish

041


Strawberry Phyllo Napoleons
Makes 16


For the Almond Cake:

4 oz. almond paste
1-1/2 sticks butter, softened
1/2 cup granulated sugar
2 eggs, separated
1/2 teaspoon almond extract
1 cup flour
1/8 teaspoon salt

Preheat oven to 350 degrees.

Place the almond paste, butter, sugar and egg yolks in the bowl of a food processor. Mix until light and fluffy. Add the flour and salt. Mix to combine.

In the bowl of a stand mixer, whip the egg whites to stiff peaks. Fold egg whites into almond mixture. The almond mixture is quite stiff so the egg whites will lose some air.

Roll the half the batter between 2 sheets of parchment paper to about 1/4 of an inch thick and place on a baking sheet. Bake for 15 to 20 minutes, till edges are brown. Repeat with second half of batter. Remove top layer of parchment paper and cool completely. Cut into 4 inch circles.


For the Phyllo Sheets:

6 sheets of phyllo dough
3 tablespoons butter, melted
2 tablespoons granulated sugar

Preheat oven to 350 degrees.

Lay down 1 sheet oh phyllo. Brush with butter and sprinkle lightly with sugar. Repeat with 2 more layers of phyllo. Cut into 3-inch rounds. Repeat with last 3 sheets of phyllo. Place on cookie sheets and bake for 10-12 minutes, till golden brown.

For the Vanilla Bean Pastry Cream:

2 cups milk
1 vanilla bean
3/4 cup granulated sugar
2 tablespoons corn starch
1/4 teaspoon salt
2 egg yolks
2 tablespoons butter


In medium saucepan, combine sugar, cornstarch and salt. Split the vanilla bean and scrape the seeds. Add the seeds and the pod to the sugar mixture. Whisk in the milk and cook over medium heat till thickened and bubble, stirring constantly. Remove from heat.

Temper the egg yolks but whisking a small amount of the hot milk mixture into the egg yolks. Add the the milk mixture and continue to cook, whisking constantly for 2 more minutes. Remove from heat. Add butter. Cool completely.

For the Orange Lace Garnish:

1 cup, plus 2 tablespoons granulated sugar
3/4 cup flour
1/2 cup orange juice
1 stick butter, melted

Combine sugar, flour and orange juice. Add the melted butter and stir to combine. Refrigerate for 2 hours or up to overnight.

Preheat oven to 350 degrees. Spread batter onto silpat lined baking sheet about 1/8 of an inch thick. Bake for 12-14 minutes till golden brown. Edges may be slightly burnt. Let cool for 2 minutes. Using a pizza cutter, score the shapes you want to end up with. Rectangles, squares, etc. Continue to cut along these lines as the cookies cool. Let cook completely and carefully remove pieces.

For the Strawberries:

4 cups diced strawberries
1/4 cup orange juice
1/2 cup granulated sugar

Combine strawberries, orange juice and sugar. Let sit for at least 15 minutes.

To assemble:

Lay down 1 layer of almond cake. Top with about 2 tablespoons of strawberries, a drizzle of the strawberry juices, and a tablespoon of the vanilla bean pastry cream. Top with a phyllo round. Add another layer of strawberries and pastry cream and repeat one more time. Garnish with a scoop of strawberry sorbet and the orange lace garnish.


Wednesday, January 12, 2011

Croissants

010

Well this was my first venture into the world of croissant making. What an adventure it was! Okay okay it wasn't that bad, but there really are a lot of steps. And there is a lot of waiting. It takes 2 days worth of preparation and planning to make these, but they are so delicious! I made regular as well as chocolate croissants...or pain au chocolate. Just sounds better doesn't it! This recipe I found worked really well. You pretty much make a basic yeast dough, and roll about 3 sticks of butter into the dough, folding and rolling, folding and rolling, so you create many layers of dough and butter. Then it rests overnight. When you bake it, the butter in the dough steams, creating those wonderful flaky layers that make a croissant so amazing. This is essentially puff pastry dough and can be used for many different things.


I rolled the dough into a 10x38 inch rectangle and cut half into triangles and half into small rectangles.

011 (2)


I rolled up the triangles into the classic croissant shape...

014 (2)


...and I filled the rectangles with chocolate.

015


My favorite was definitely the chocolate!

013


I still have some dough left over. I might make some more croissants or use it for something else equally as delicious. I would say these were definitely worth the extra time and work!


Monday, January 10, 2011

All Good Things Are Wild and Free..

Final

I recently saw this Thoreau quote on Indie and Chic and I loved it. She used it for this awesome spray paint plywood project. I have been trying to think of a way to use this quote. I have been so inspired by vintage fabrics lately. The background fabric I chose is actually a clothes pin bag. It would have been hung on a clothes line and the clothes pins would be stored in it. It was the perfect size for this project. I think I'm going to use this as a print and frame it.


My mom has a really lovely collection of vintage aprons and linens.

046

I also just got the cutest assortment of bakers twine from the Parcel and Paper Etsy store. 600 feet of gorgeous rainbow twine for only $15.00!

007

This project was simple. Cutting all of the letters out was a bit time consuming, but somewhat calming at the same time.

028

025

I am very happy with how this turned out! It is such a whimsical quote. Hopefully seeing it everyday will remind me to be more free spirited and adventurous!

Sunday, January 9, 2011

Meyer Lemon Thyme Bars

005 (3)


Lemons, lemons, and more lemons. I got a bunch of lemons from my neighbor today. Not just regular lemons though, these are meyer lemons. She doesn't really use them from her tree so she told me I can take them whenever I need them! It is great because I really love meyer lemons. They are a cross between a standard lemon and a tangerine. They are still very tart, but have a more rounded sweetness to them. They are really the only lemon I ever use. So with such an abundance of lemons, I wanted to make a dessert that would really showcase the lemon itself.

Lemons

IMG_0104

There is no better way to feature lemons than in the classic Lemon Bar. Thyme is one of my favorite herbs, and one I use most often in the kitchen. It grows so well in the backyard so I always have it on hand. Thyme has a naturally earthy, lemony taste to it so I thought it would really enhance the meyer lemons in these bars. I used Ina Garten's Lemon Bar recipe and added a few of my own touches to it.

Good One

__________________________________________________
Meyer Lemon Thyme Bars with a Pistachio Crust
Makes 20 to 30, depending on size and shape

For the Crust:

2 sticks unsalted butter, room temperature
1/2 cup granulated sugar
2 cups flour
3/4 cup finely ground pistachios

For the Filling:

6 eggs, at room temperature
3 cups granulated sugar
2 tablespoons grated meyer lemon zest
1 cup freshly squeezed meyer lemon juice
1 cup flour
1 tablespoon fresh thyme
Confectioner's sugar for dusting

Directions:

Preheat the oven to 350 degrees.

For the crust, cream the butter and sugar in the bowl of an electric mixer until light, about 5 minutes. Combine the flour, pistachios and salt. With mixer on low speed, add flour mixture to the butter and sugar. Mix just till combined. Press dough into the bottom on a 9x13 inch baking dish. Chill for at least 15 minutes. Bake for 15 to 20 minutes, till crust is lightly golden. Cool completely.

For the filling, whisk together the eggs, sugar, zest, juice, flour, and thyme. Pour over the crust and bake for 30 to 35 minutes, until the filling is set and slightly golden around the edges. Cool to room temperature and cut into squares or triangles.


Thursday, January 6, 2011

Sesame Matcha Biscotti

Good One 2


I was really in the mood for green tea and I wanted to make something delicious to go with it. I looked in my pantry and found sesame seeds, almonds, ginger root, and chocolate chips.


1


2


Matcha Sesame Biscotti


I adapted a recipe I found on Nancy H. Elliott's blog.
____________________________________________________
Sesame Matcha Biscotti
Makes about 3 dozen biscotti

1/3 cup slivered, blanched almonds
1 teaspoon sesame seeds, plus 1/2 cup for garnish
2 ½ cups all-purpose flour
1 cup granulated sugar
1 teaspoon baking powder
2 tablespoons matcha
¼ teaspoon salt
3 large eggs
4 tablespoons unsalted butter, melted
1 teaspoon vanilla extract
1/2 teaspoon freshly grated ginger root
1 large egg white, lightly beaten
2 tablespoons sanding sugar mixed with ½ teaspoon ground ginger
1 cup dark or semi-sweet chocolate, chips or chopped
1/4 cup heavy cream

Preheat oven to 350°.

Coarsely chop the almonds and sesame seeds. Whisk together the flour, sugar, baking powder, matcha, almonds, sesame seeds and salt. In the bowl of a stand mixer, combine the eggs, butter, vanilla and fresh ginger. Add the flour mixture to the wet ingredients and mix to combine.

Turn the dough out onto a lightly floured surface. Knead gently 4 or 5 times. Divide dough in half and shape into 2 12-inch logs. Slightly flatten the tops. Place on parchment or silpat lines baking sheet. Brush lightly with beaten egg white. Dust generously with ginger sugar. Bake for 25 to 30 minutes. Cool enough to handle.

Reduce oven to 275°. Cut logs into 1/2 inch slices. Lay cookies cut side down on baking sheet a bake for 15 minutes. Using tongs, flip biscotti and bake for another 15 to 20 minutes.

Using a microwave on low heat or a double boiler, melt the chocolate and the heavy cream together. Dip one end of each biscotti into the chocolate. Then dip just the tip in sesame seeds. Cool till chocolate sets.
____________________________________________________

These biscotti paired really well with a good cup of hot green tea. They were super easy and really tasty!

Good One 3

Tuesday, January 4, 2011

A Tiny Quilt

I found a small vintage quilt. It must have been for a baby. I loved the colors in it and I wanted to do something with it.


Small Quilt


I sewed tiny loops on the corners and right in the middle with regular thread.

Small Quilt Loop Holes

I put three cup hooks into the wall. Getting them perfectly measured was the only tricky part, but it was fairly simple.

Small Quilt Finished

I think I'm going to keep hanging pretty things from the cup hooks. I'm glad I could give this little quilt a new life! And it made an otherwise boring wall much cuter.